
Starter plug.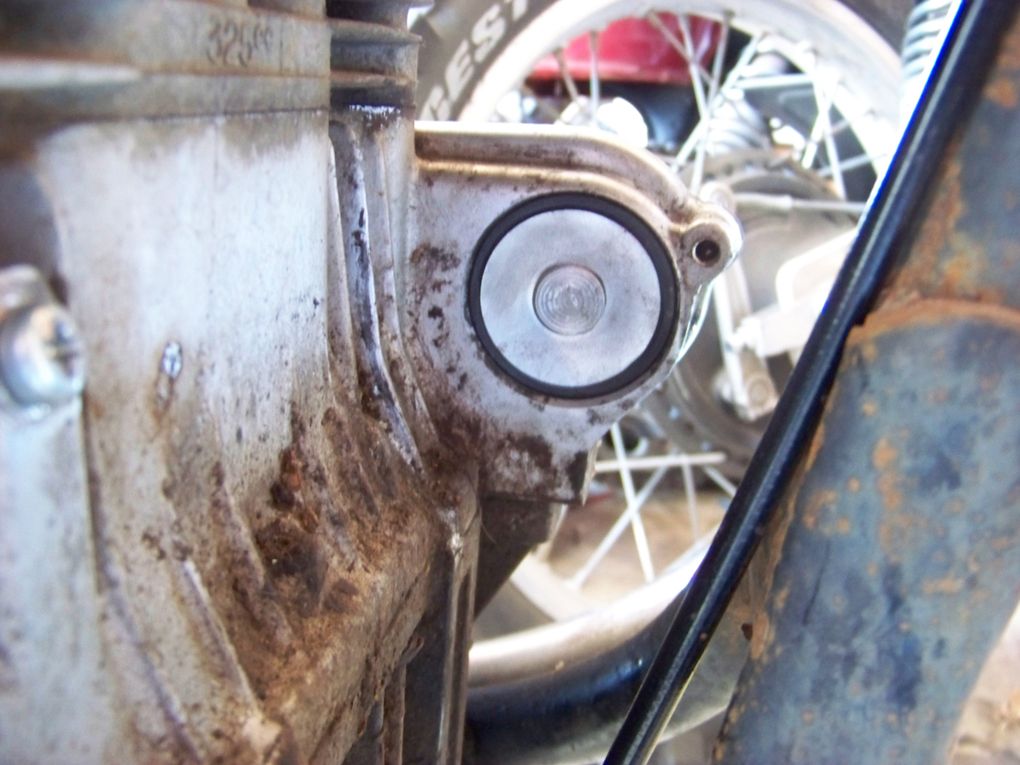
Battery box modified.
Fender mounts.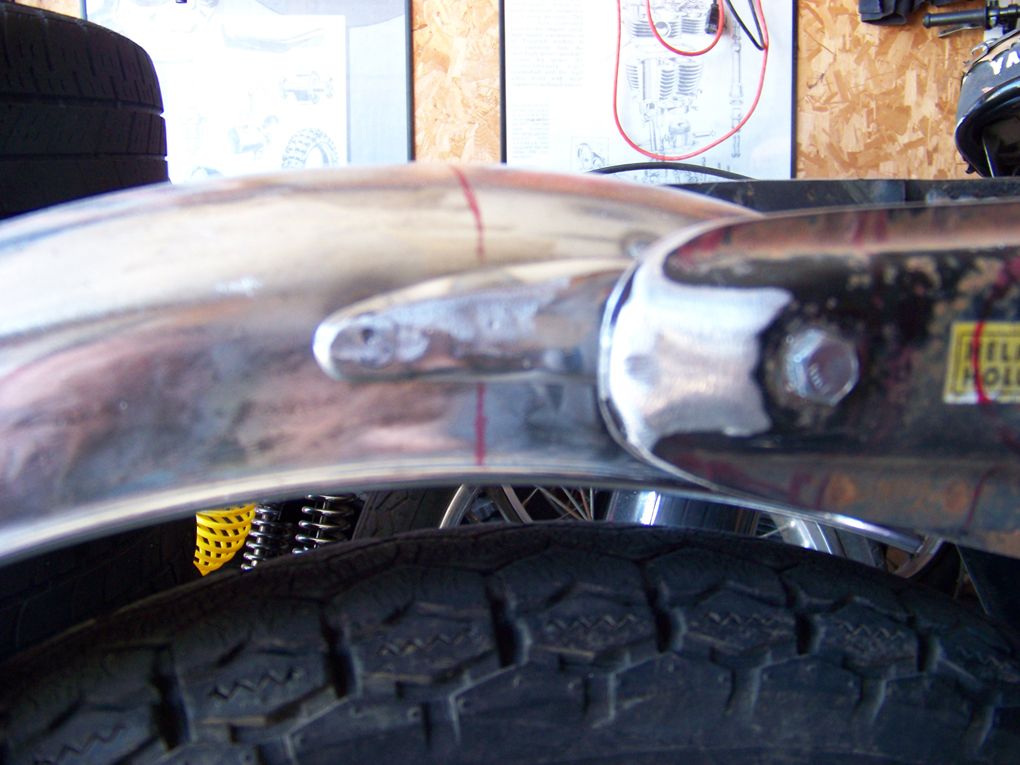
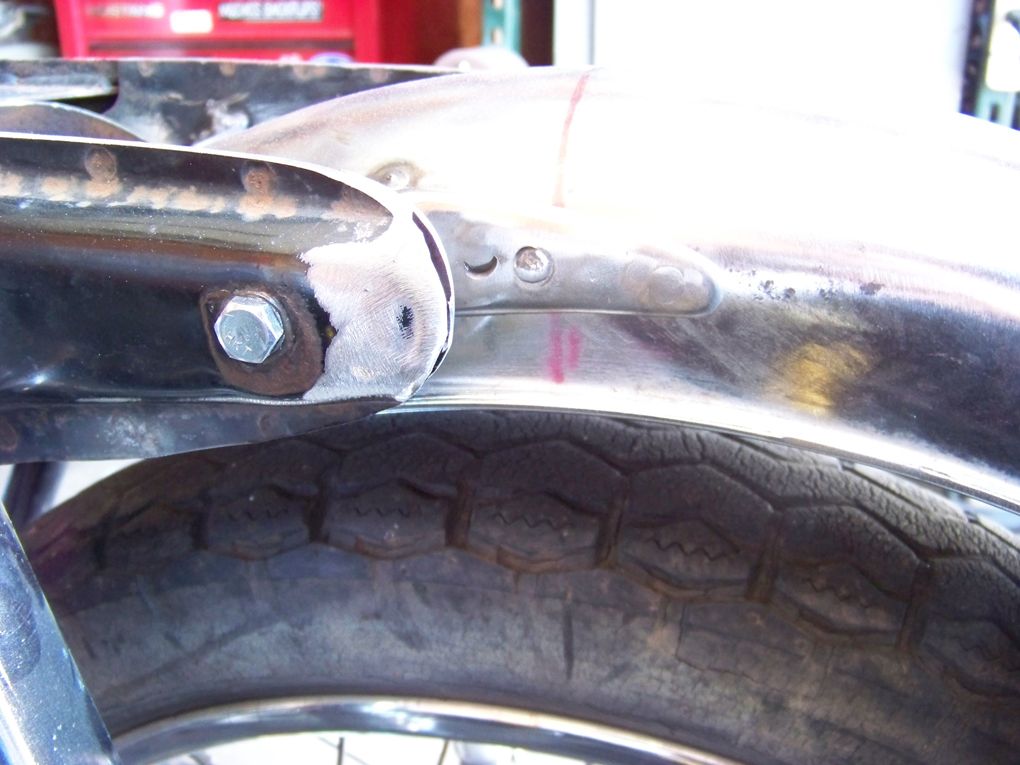
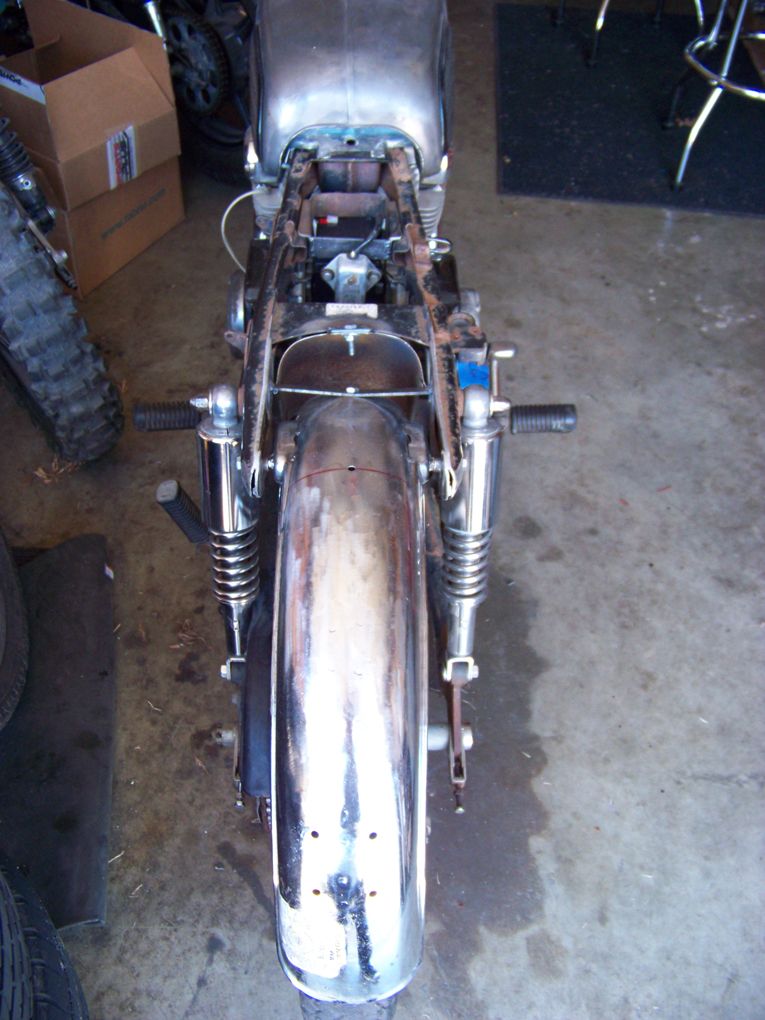

I still need to weld the seam on the frame horns and make a tail light mount to officially finish up the rear.
2/23/12
cl350 build/entry : part 7
2/8/12
2012 ozark mountain scramble
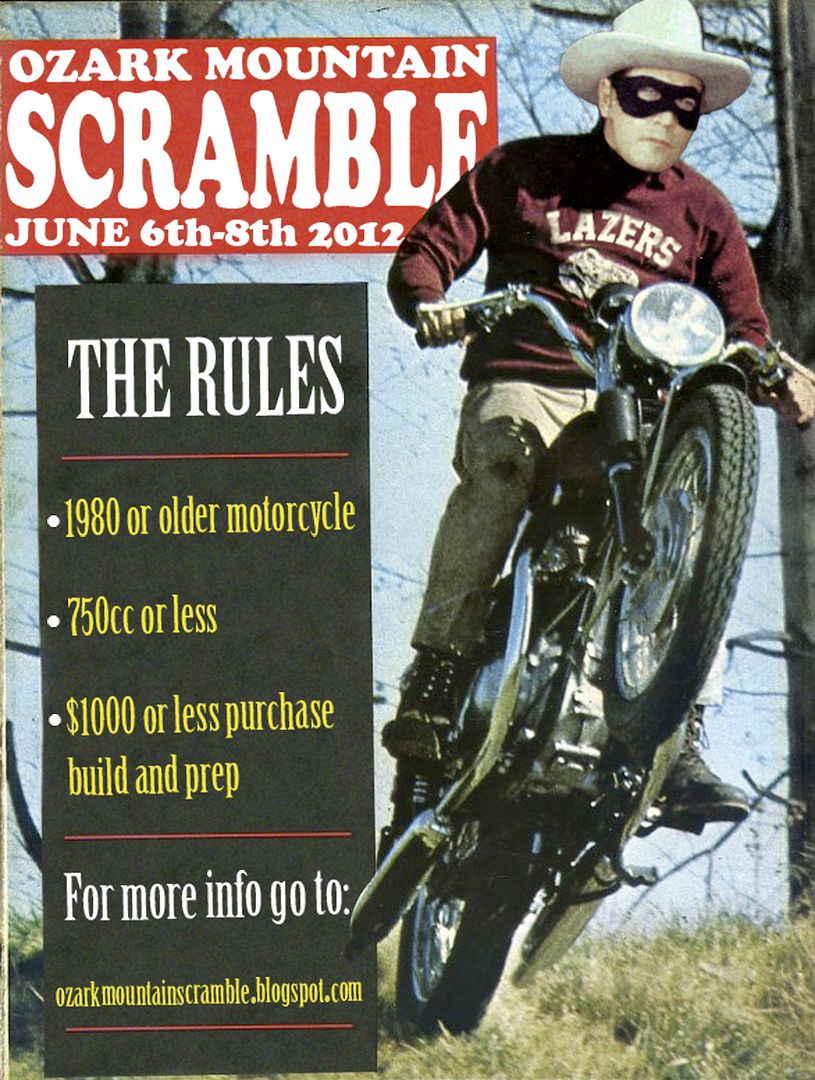
June is creeping up now, and so far this years build logs have already doubled! I couldn't be more stoked to see so many people ready to join in the shenanigans.
Now that the riding group is swelling at an enormous rate compared to last years, I would like to point out that you will need to be self sufficient at all times. Familiarize yourself with the maps and do your best to help out others that may stumble along the way. There will be specific route maps posted soon, along with specific meet times so everyone will know when and where to go. If you choose to leave at a different time or place that is up to you. Simply put, let's all just have fun riding old cheap motorcycles through the mountains.
For any other information, updates, or just to follow the build logs, go to www.ozarkmountainscramble.blogspot.com
2/6/12
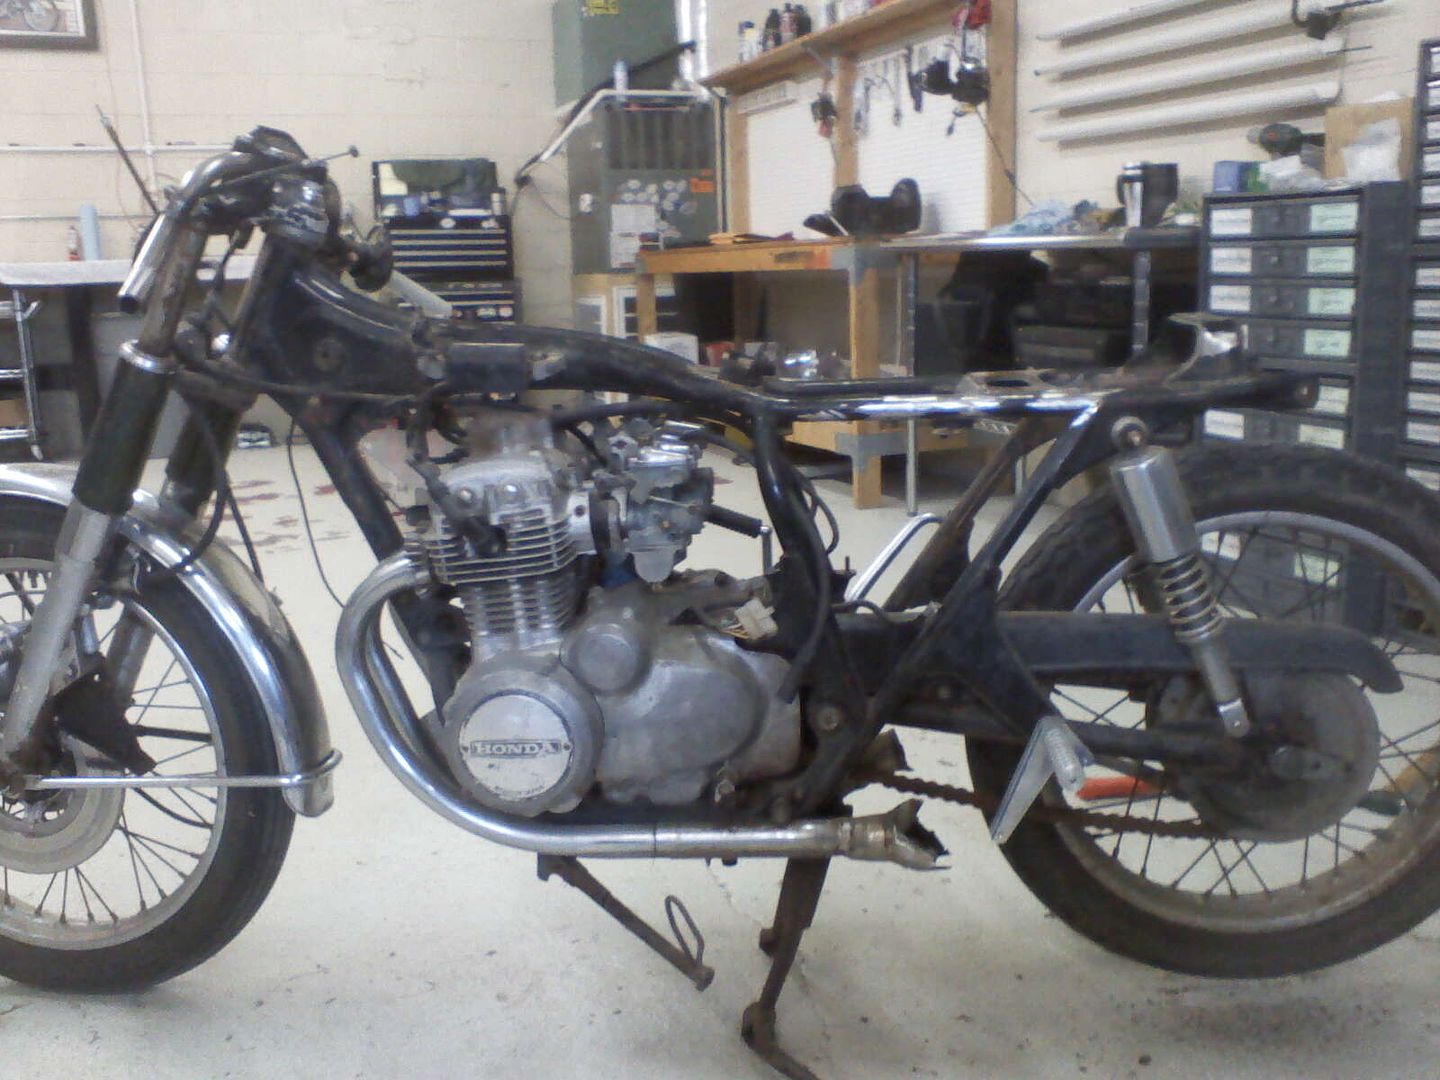
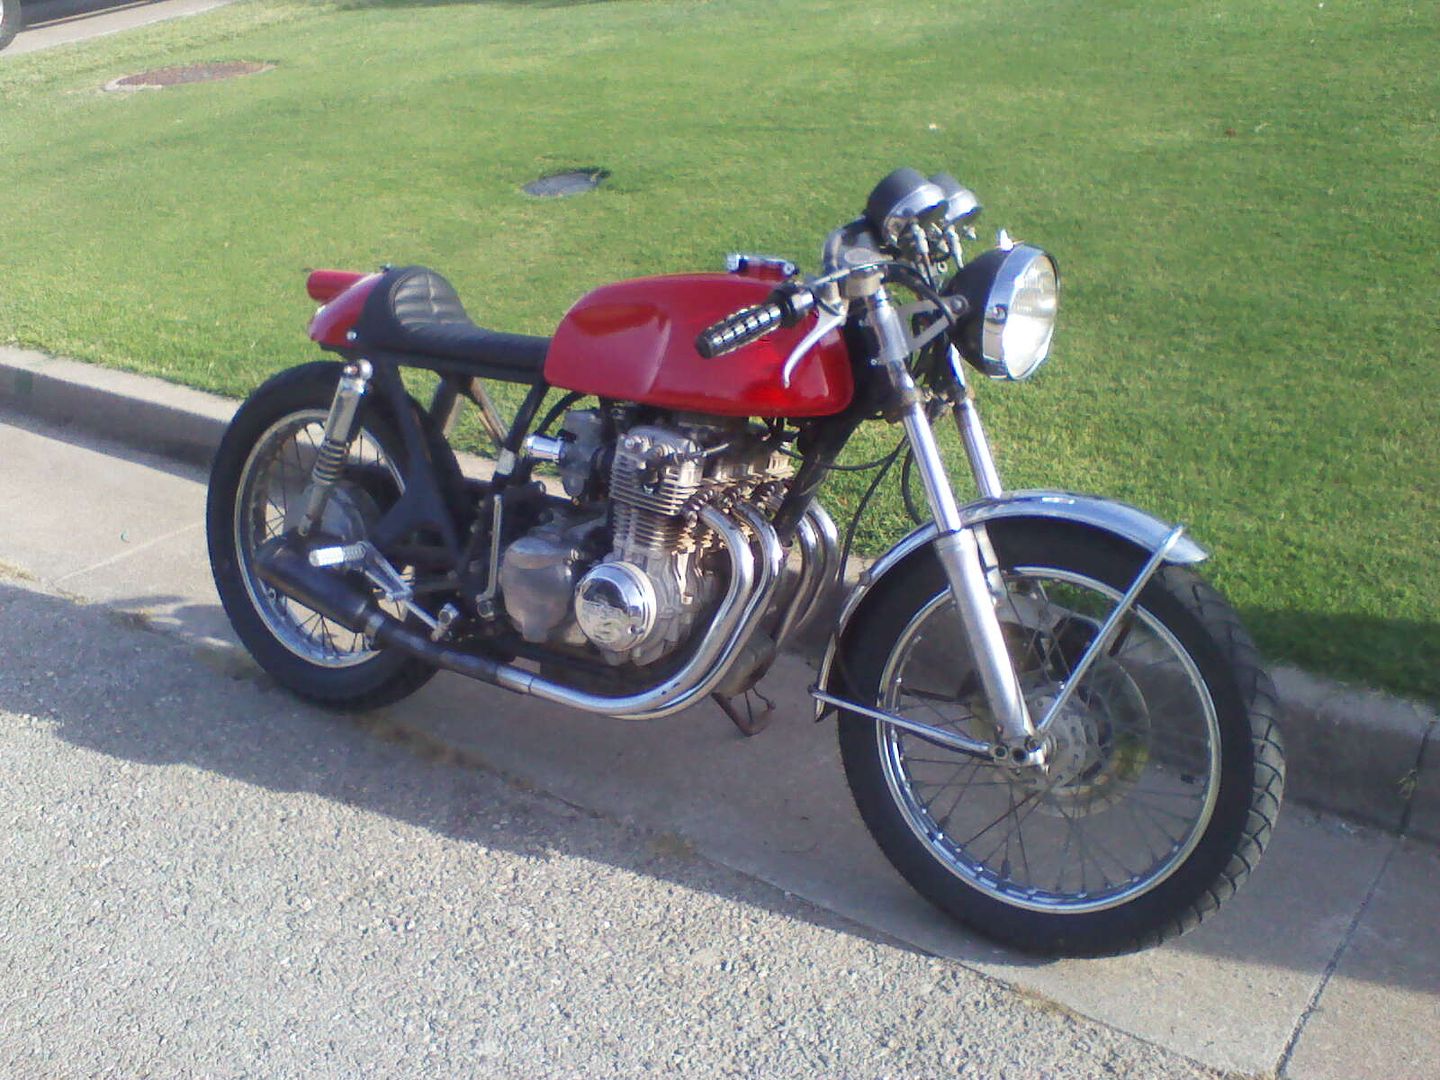
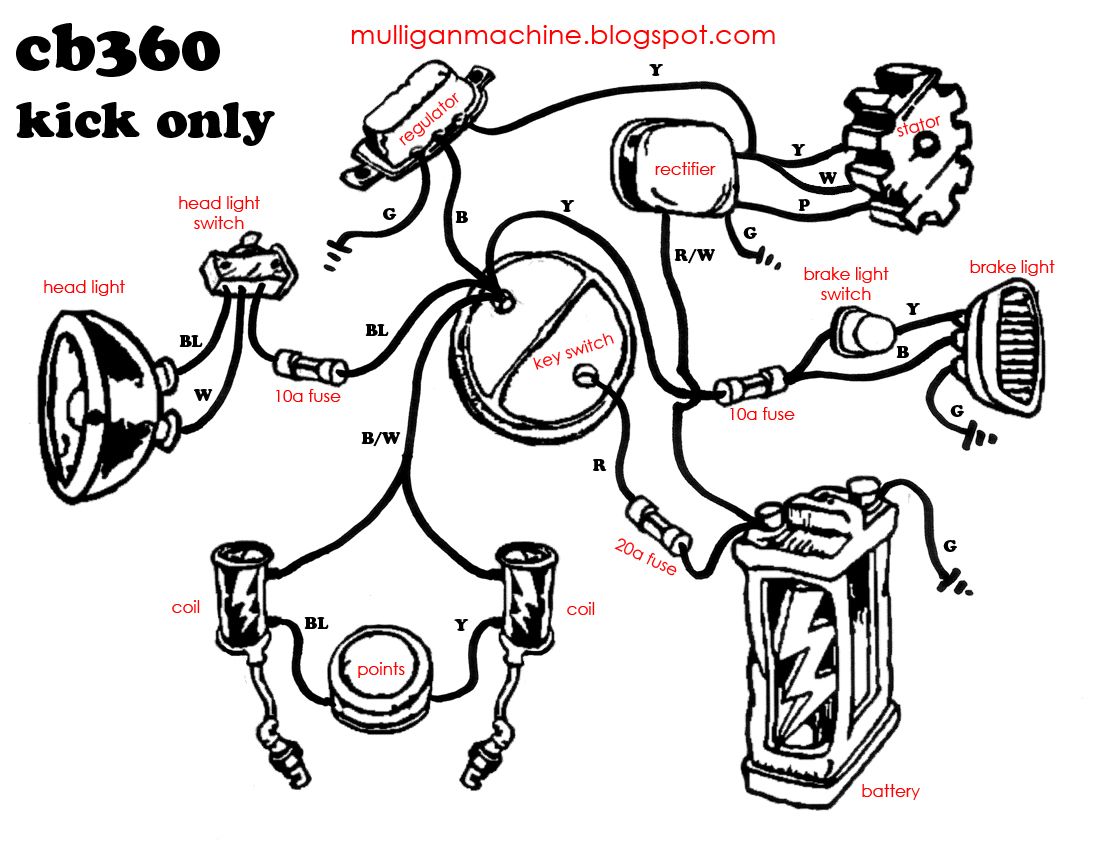
cb350f build/entry : part 1
Here's my cb350f. It had been sitting in a friend's shop for a few years collecting dust in a corner. He said it hadn't ran since he had it and probably hasn't in about 3yrs or so before he got it. Since the motor would kick over and seemed to have decent compression I figured it would run. He told me $75 but ended up just giving it to me to get it out of his shop.
When I got it home I poured some gas down the carbs, hot wired the ignition, and got it started. While it was running, even though it ran like total shit, I ran it through the gears and all was good. Game on.
A quick trip to the tube bender with some 7/8 dom and some bars were whipped up.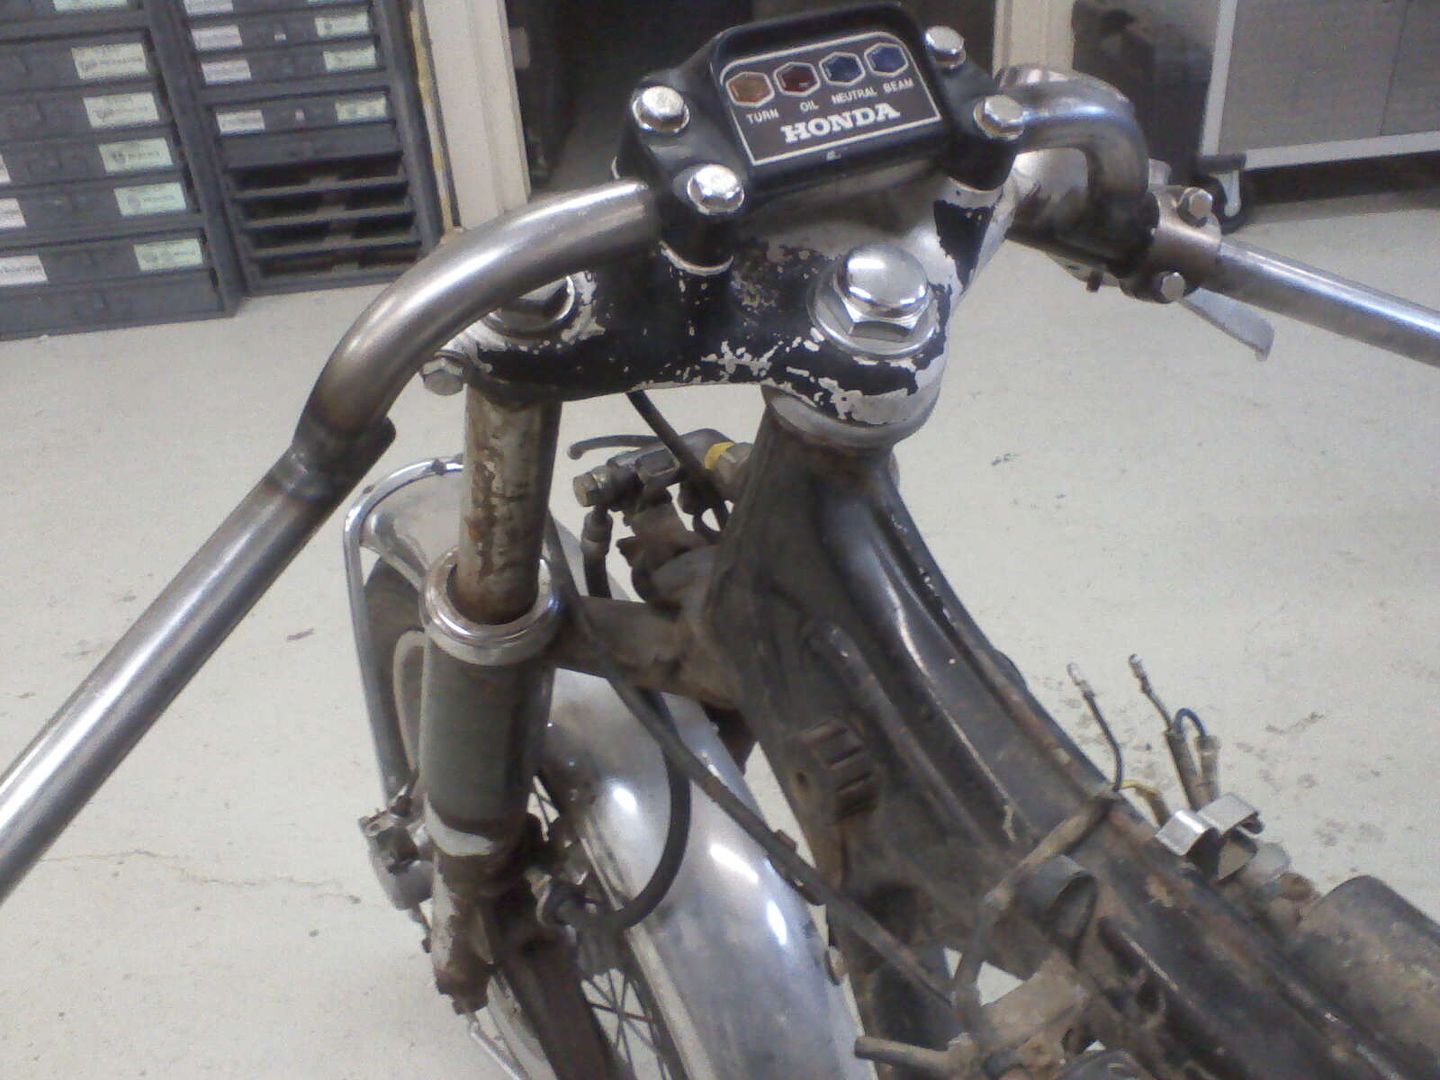
Some 1/2 aluminum and some time with the bandsaw and mill and some rearsets were starting to take shape. Next I knurled some round bar stock for the foot pegs.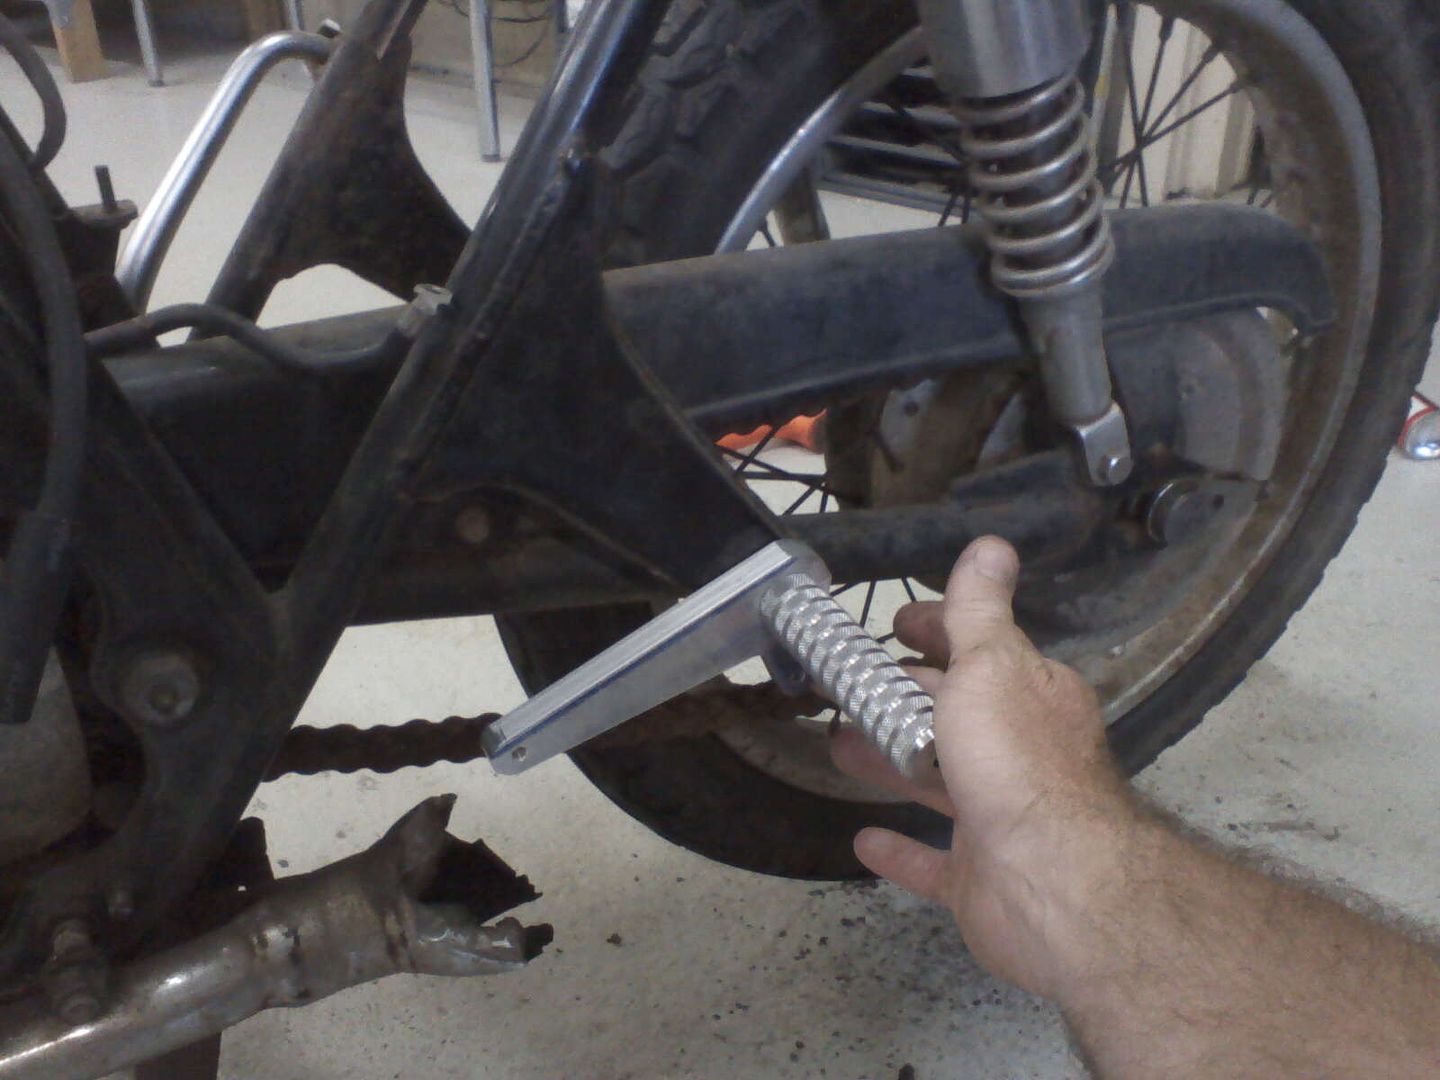
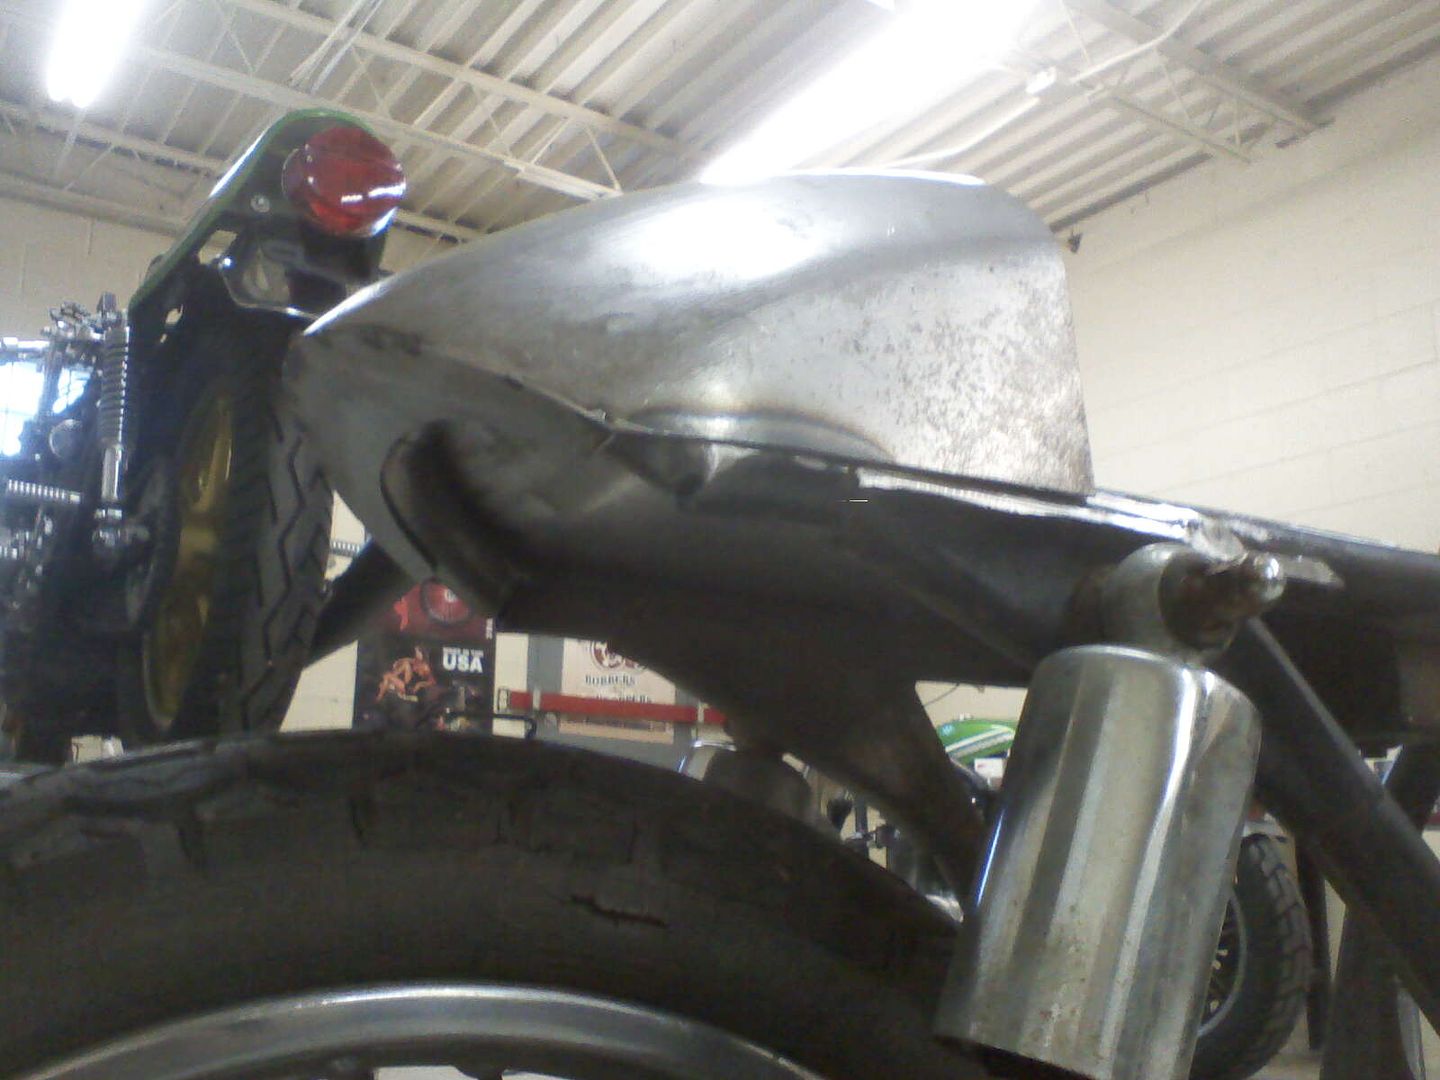
After trimming the rear of the frame off I bent a piece of tubing to round off the back of the frame. I added the sheetmetal to serve as a floor for the tail section.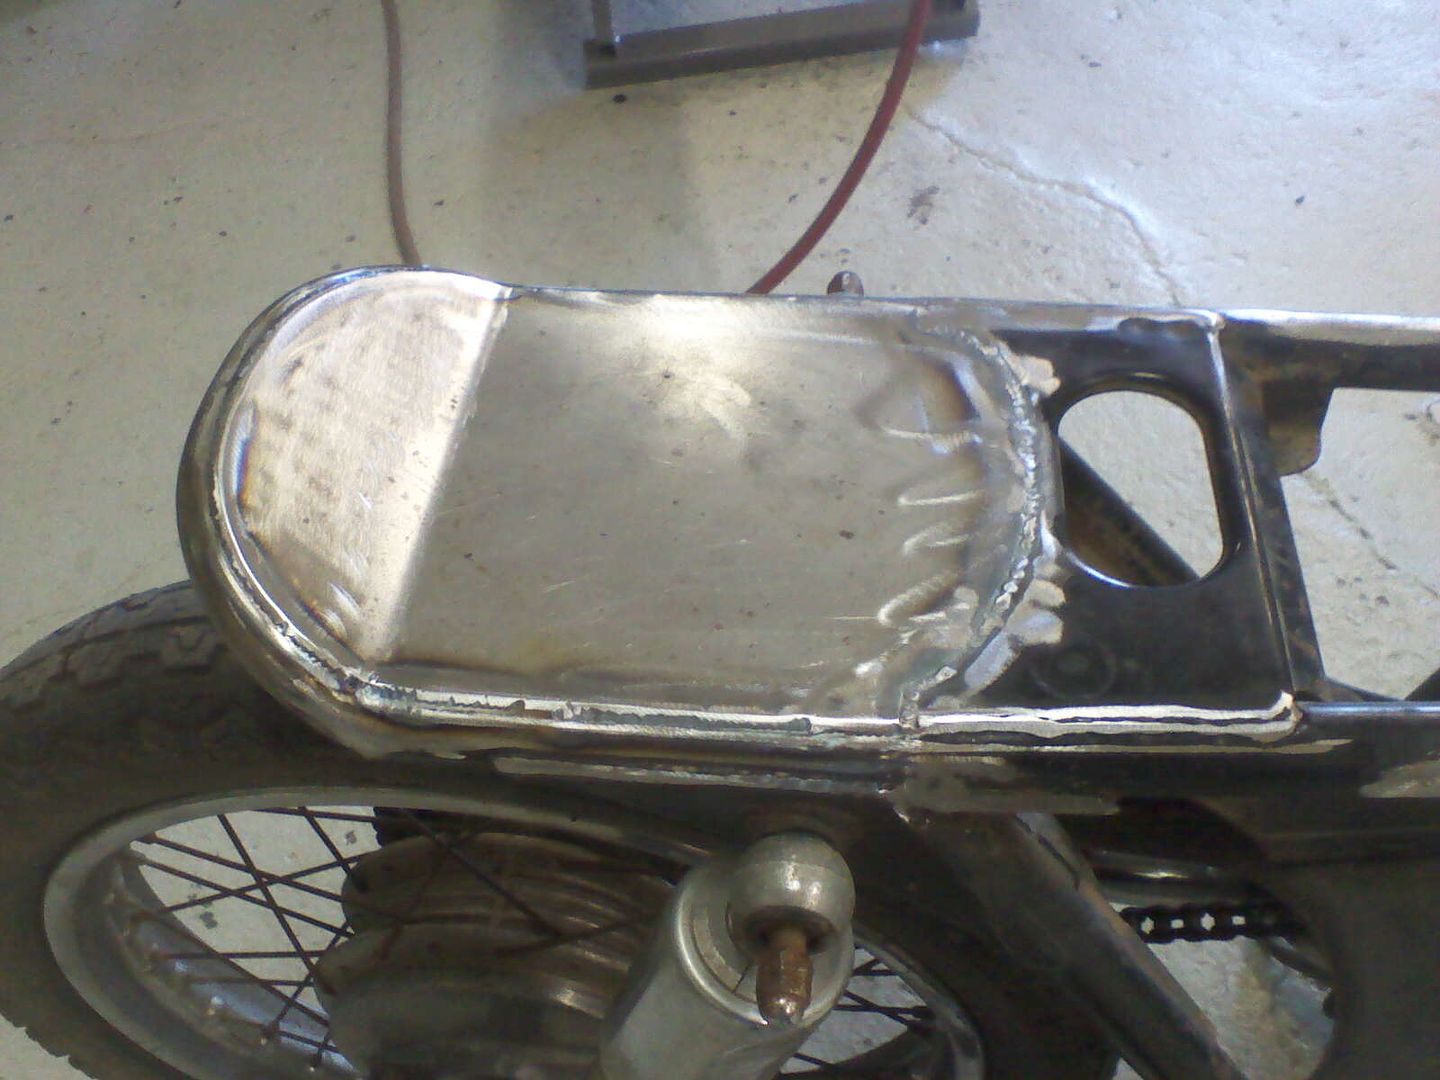
The tail section begins. I looked around the shop and dug up a piece of rear fender that was left over from a previous chopper build. After narrowing it a few inches and beating it with a hammer and a few minutes on the planishing hammer it was finally starting to take shape.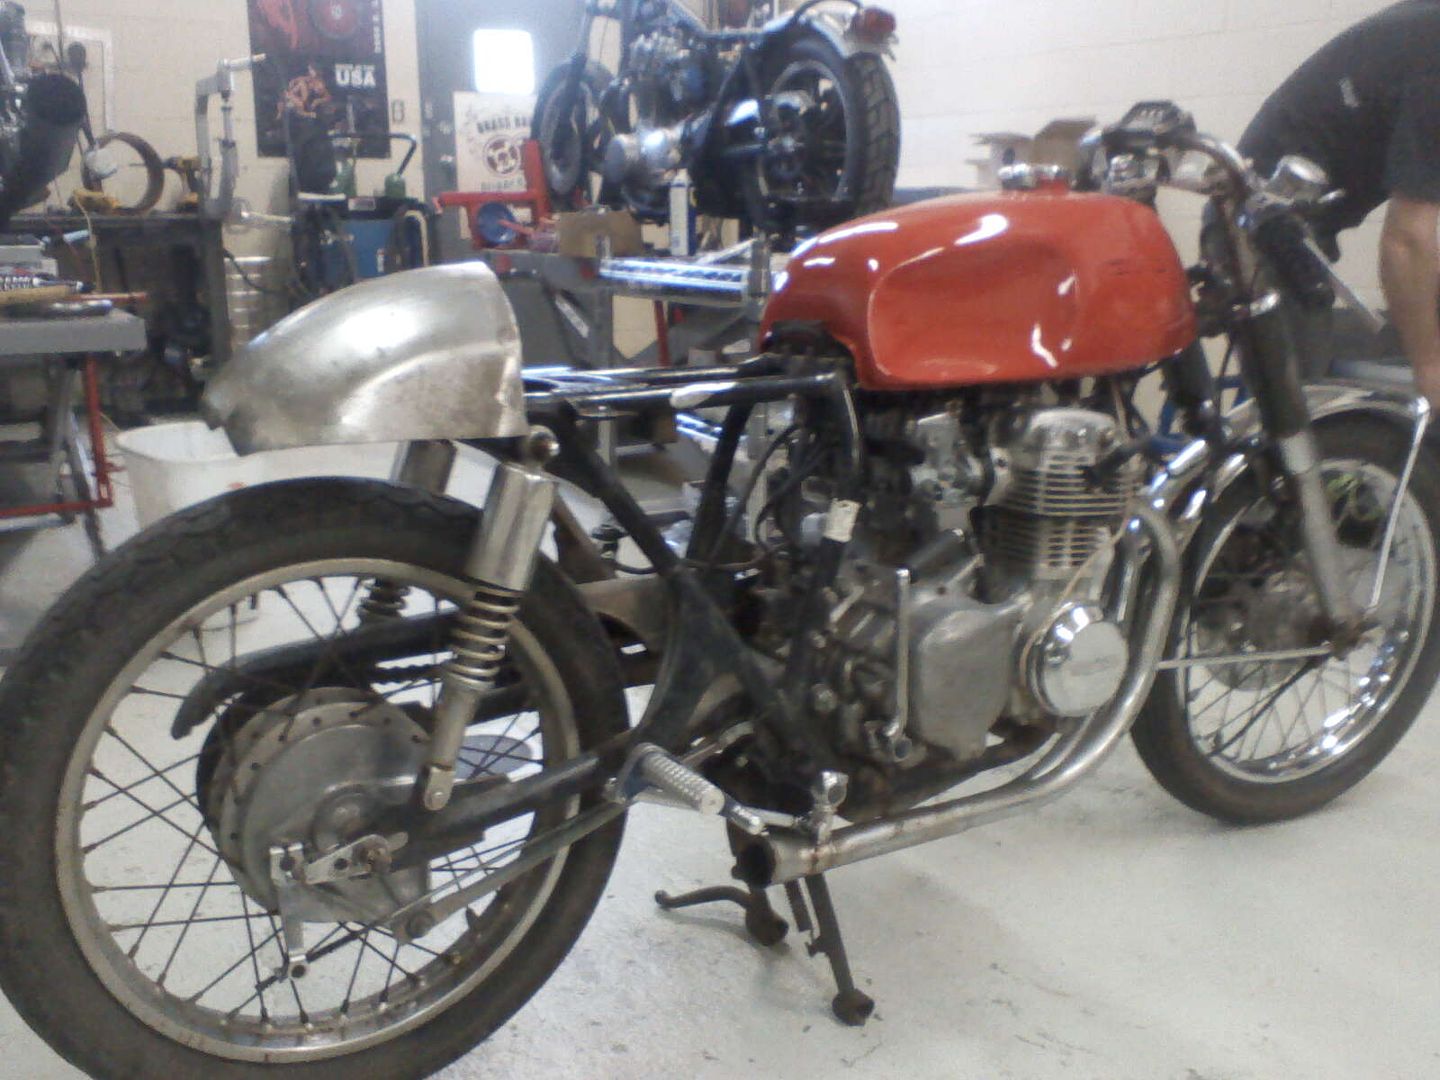
So I got excited and pushed the sides in on the original tank. A thin layer of bondo in the newly formed areas, some rattle can primer, and it was ready for paint. There was a paint shop across the street so I had them mix up a rattle can of Subaru red, gave em $16 and away I went.
Now for the seat pan. The pic doesn't show it but I put three spikes on the bottom of the pan that fit into holes in the sheetmetal part of the frame. These keep the seat from sliding around since all that will be holding it on are some snaps. Also, now you can see the reverse meg mufflers I had made. I also had to make the collectors for it since the old mufflers were rotted off. Oh yea, the rearsets are now finished also.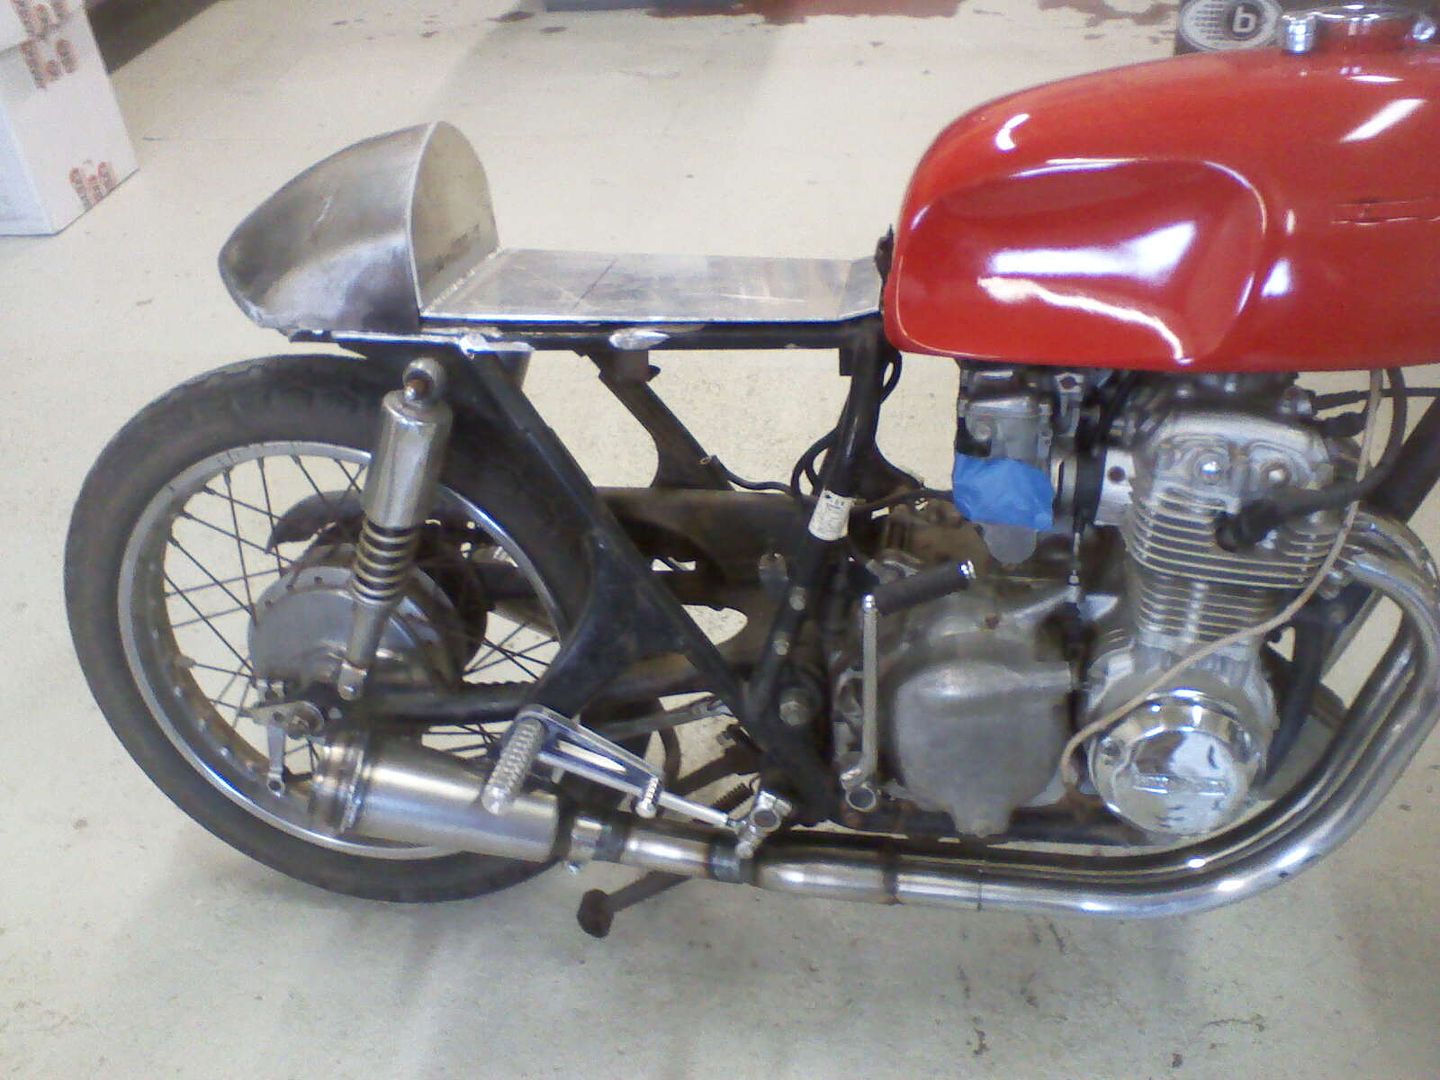
Long story on the tail light. I used an after market harley lens and guts but had to custom machine the housing out of steel so Ii could weld it to the tail. (the Harley one is made of aluminum)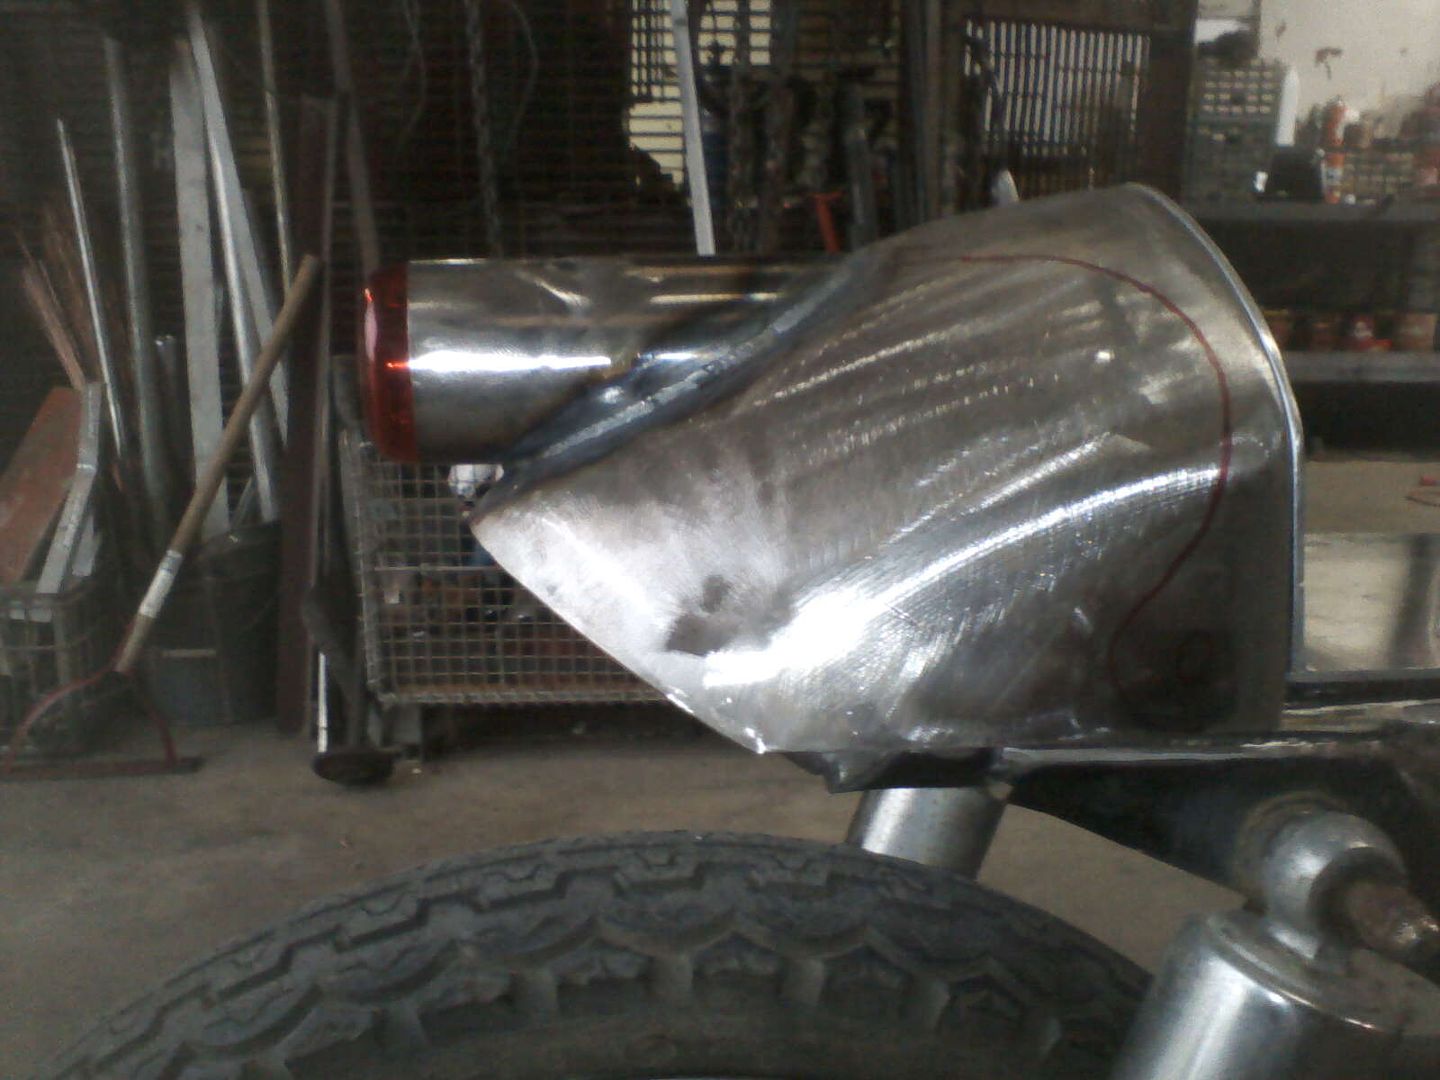
I had just barely enough of the $16 rattle can to paint the tail. I loaded the bike up and took it to my buddy Kyle and we went to work on the seat. I did the foam and he did the stitching on the leather.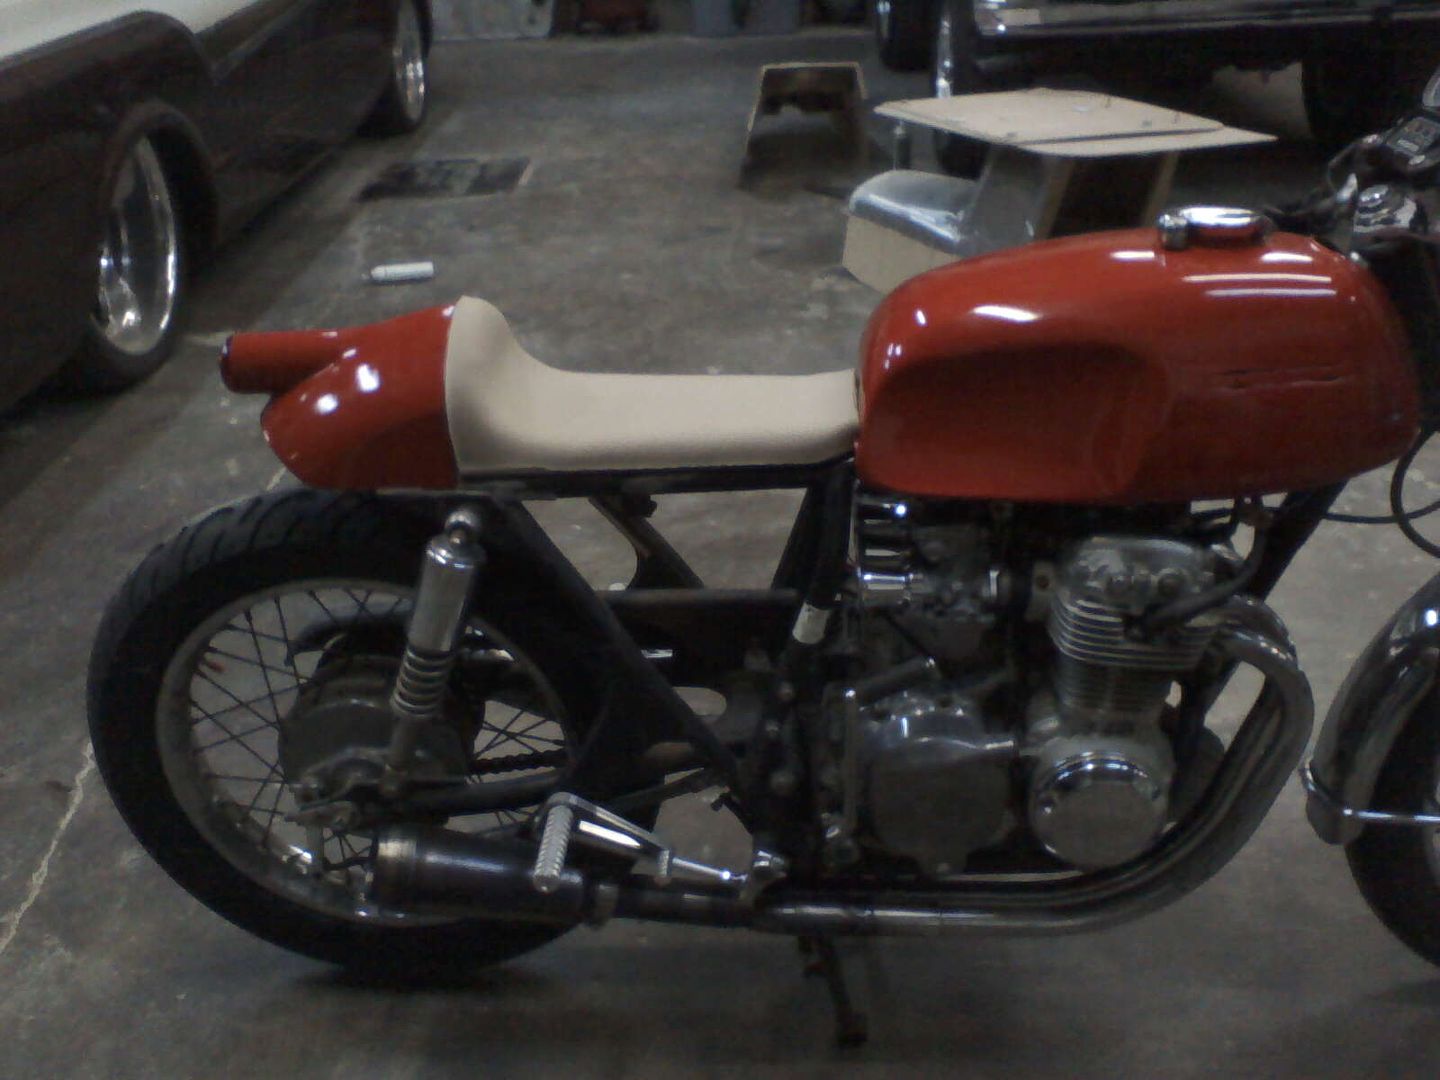

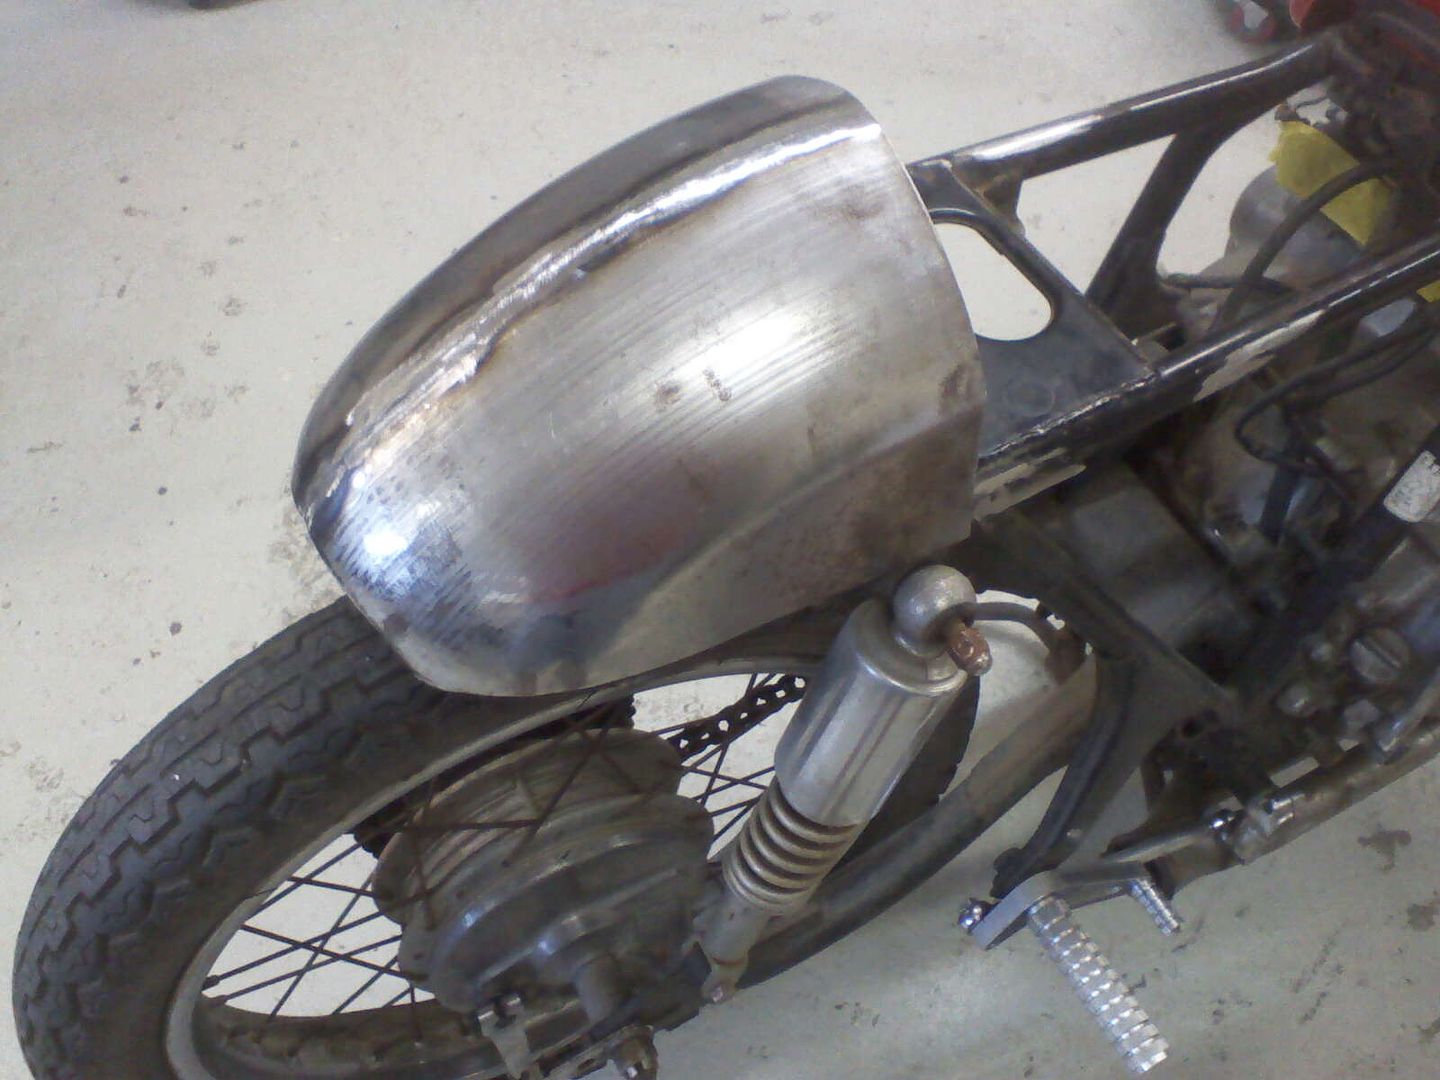
Headlight mount. Since my headlight mounts were bent and pretty crappy I removed the fork covers and made these out of aluminum tubing and 1/8 sheetmetal.
I was going to make my own velocity stacks but decided to take the easy way out. I ordered a set from Dime City Cyles as well as a regulator/rectifier (I didn't want to have to run a seperate regulator)
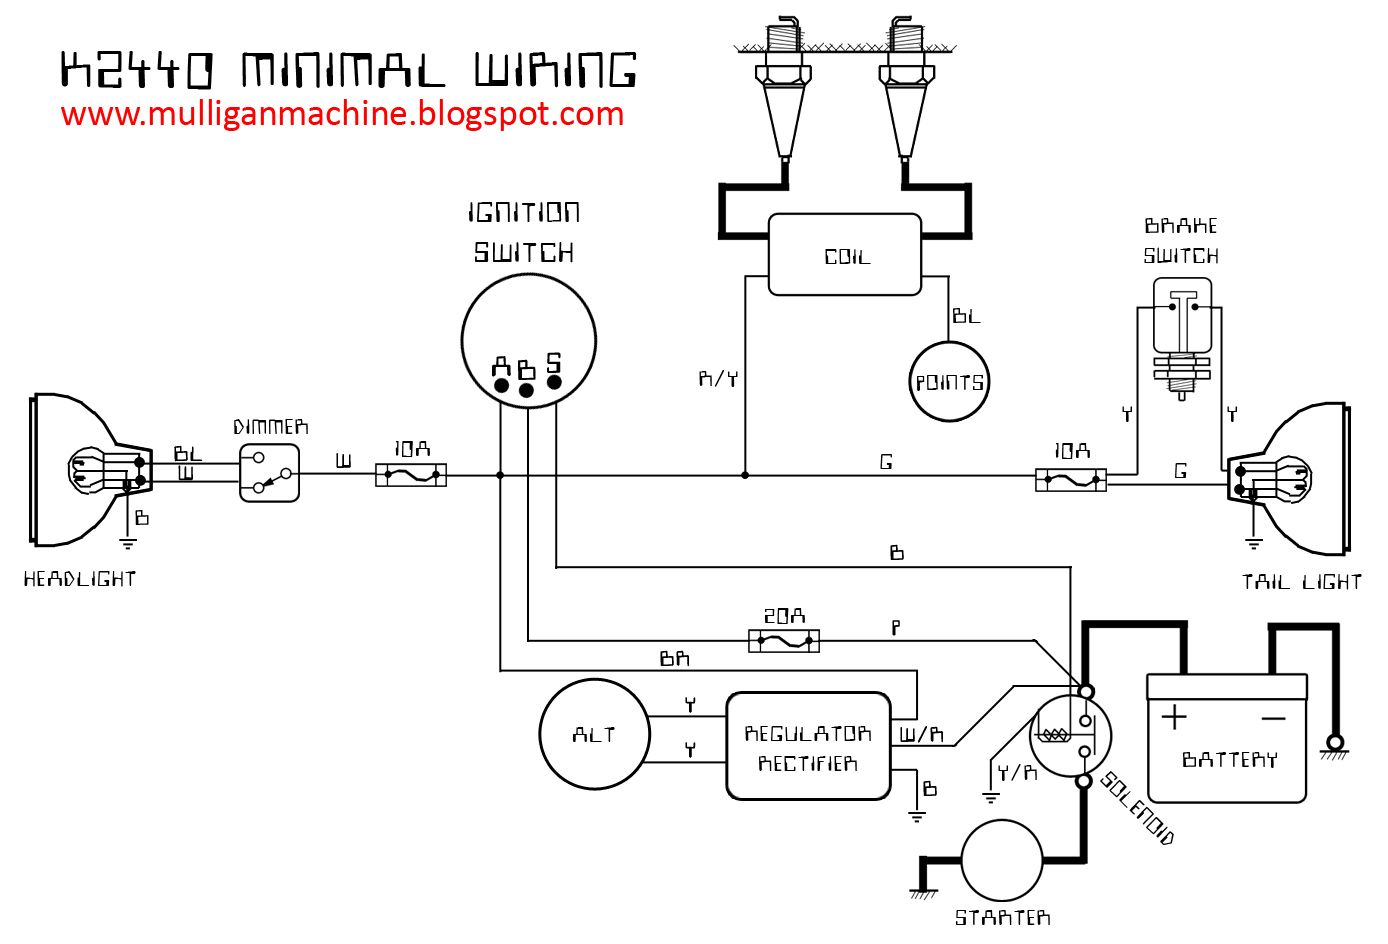
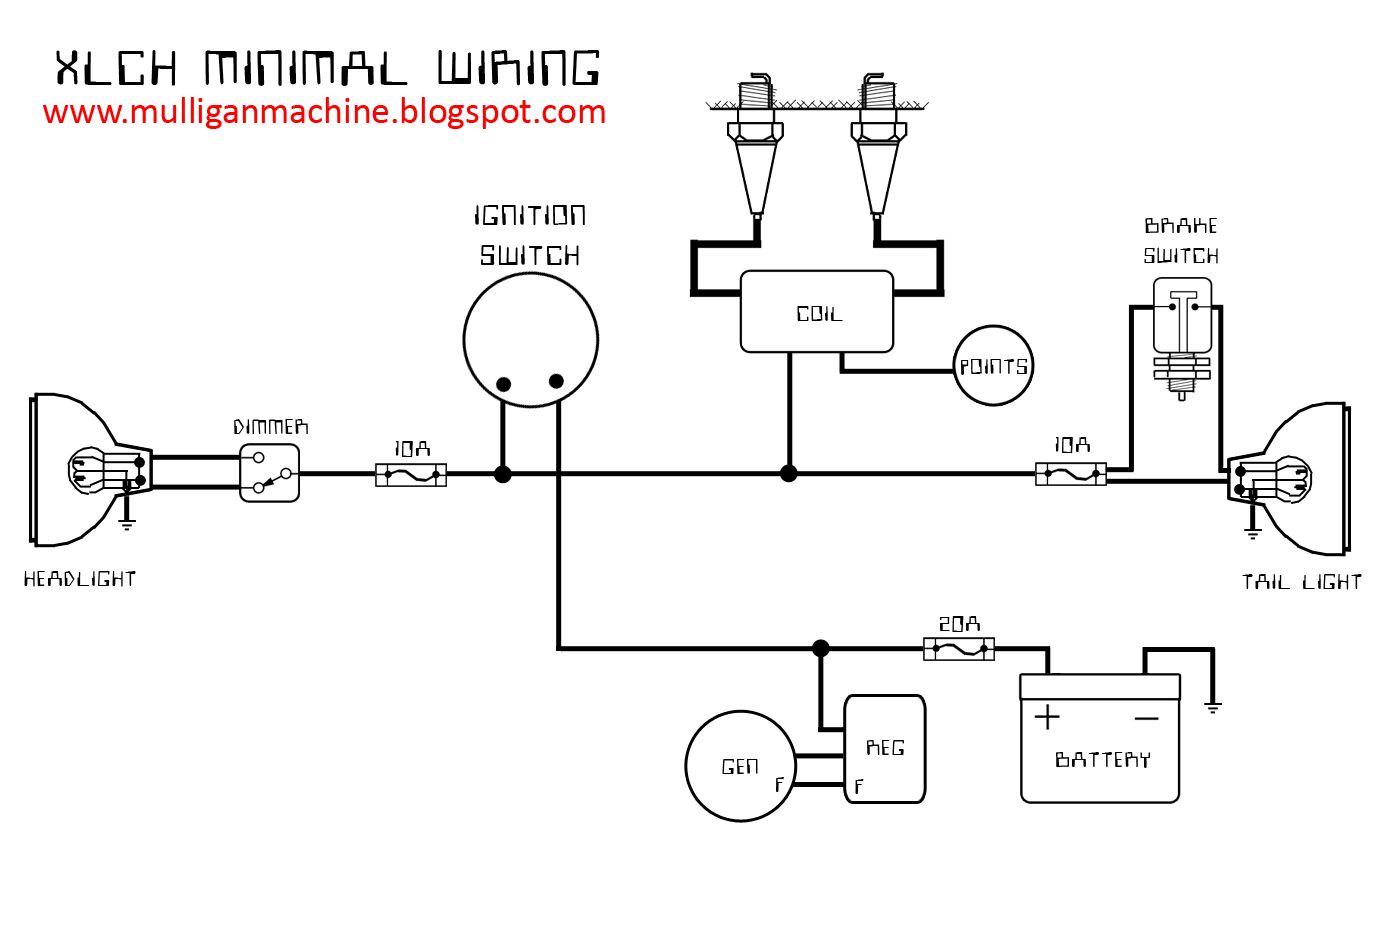
I whipped up a custom wiring harness for it that is very minimal. The Ballistic battery is mounted inside the tail. 80 amps out of a battery that is 2"x2"x3" CRAZY! Even though it will crank the bike it is kick only. After rebuilding and syncing the carbs, installing new plugs and adjusting the points it runs like a champ, even though it does smoke.
Tim Davis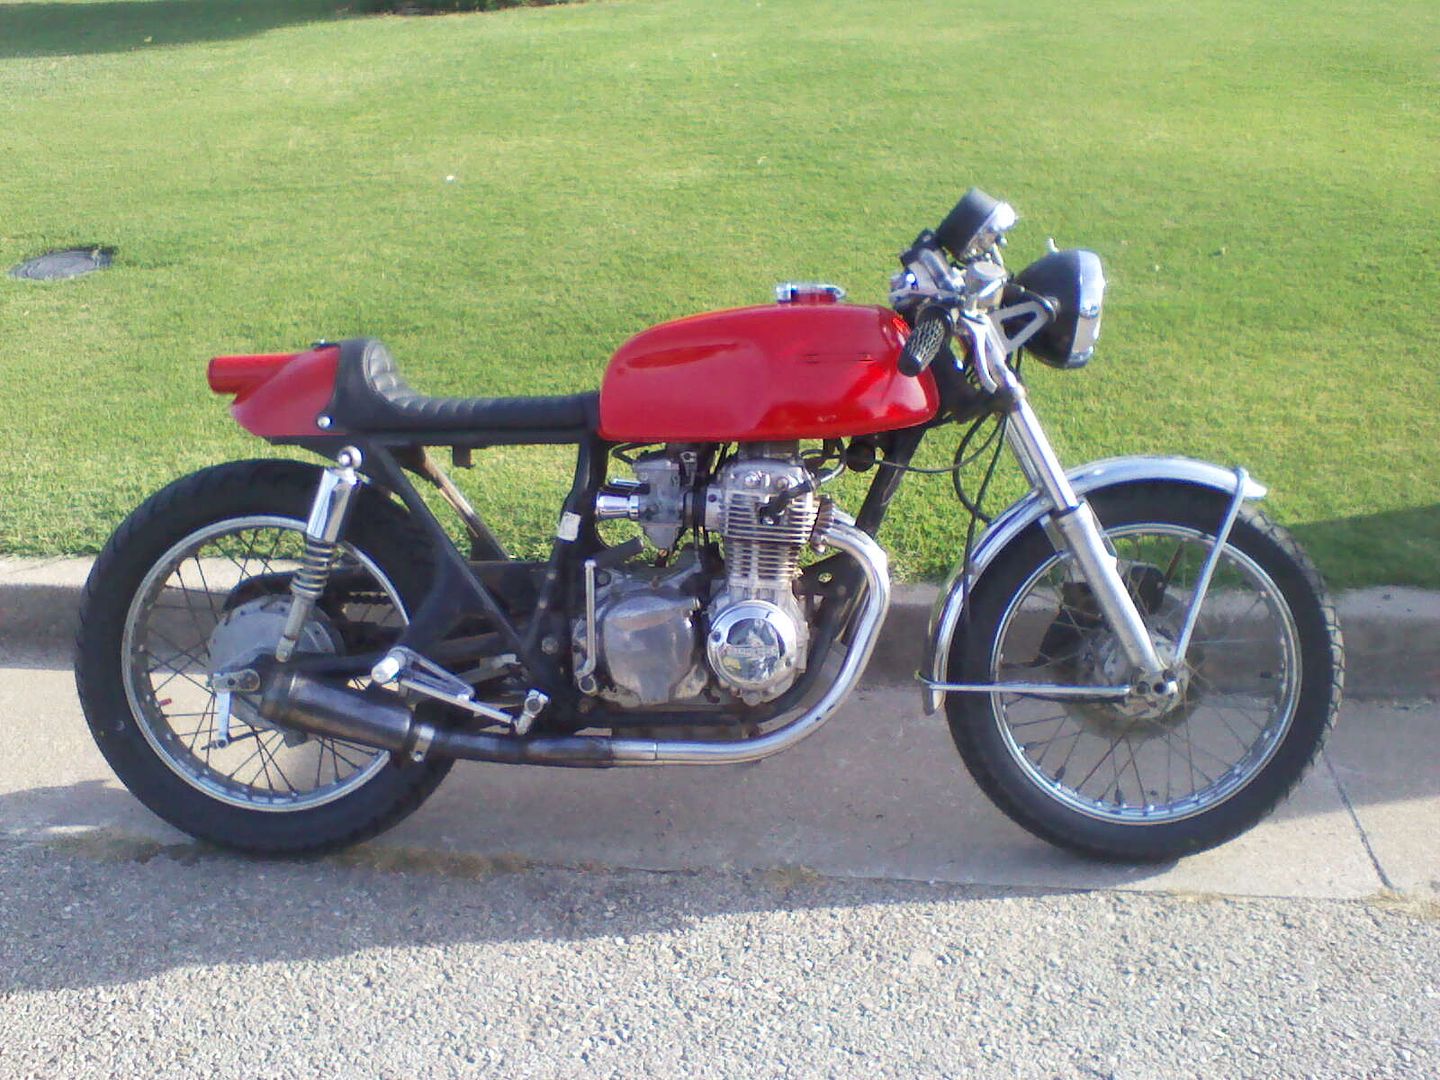
2/1/12
xl500 build/entry : part 3
I scored an '82 swingarm that bolted right into the '79 frame-Wahoo!! A match!! I scoured the 'hood begging and borrowing for some rear shocks. After a few whacked ideas about pit bike shocks and clapped out cb550 shocks being mounted in the mono shock position not working out, I'm back to a full sized mono shock. Looks like some travel limiting devices will be in order for the rear shortly.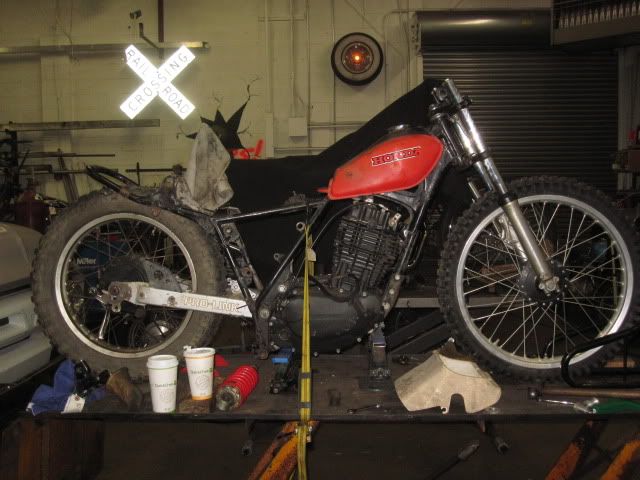
I have a bunch of rear axle spacers and such to work out this weekend to get that rolling and bolted on legit so I can really try some shock ideas.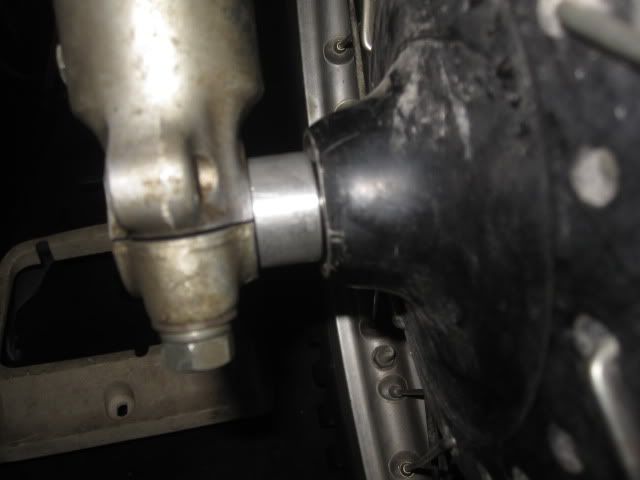

The front end took a whole butt load of labor to make such a small step. I wound up using the stock cb360 axle. I picked up some bearings with a 15mm bore and bored out the brake plate bore and the bearing spacer inner support. I also found some aluminum scraps that made killer spacers. I also finally found the upper bearing nut for the stem so I sectioned and slugged and welded the stem up. I trimmed off the steering lock and built up the stops with some weld to get them to work with the original xl500 frame stop. I still have some clean up to do but it's all together. Pix. are really unimpressive looking as it looks like it should look. That sucks that so much work looks like nothing. Well, there's my 2 week update. If this rate continues I might just make it to the run....in 2013!!!!
Mike47
Subscribe to:
Posts (Atom)